Step 1: Configure Visual Studio Studio with GitHub.
Configure Visual Studio Code (VS Code) with GitHub integration for a seamless development experience. Ensure your Salesforce project is well-organized within VS Code.
- Begin by creating a new folder within your Visual Studio Code interface. Inside this folder, create a new file to work with.Begin by creating a new folder within your Visual Studio Code interface. Inside this folder, create a new file to work with.
- To confirm your Git version, access the terminal within VS Code and enter the command: git –version.
- Initialize a Git repository for your project by executing the command: git init in the terminal.
- Add your files to the staging area using the command: git add *. This prepares them for committing.
- Commit your changes with a descriptive message using the command: git commit -m “Initial Commit”.
- Establish a connection to your GitHub repository by first creating a repository on the GitHub platform. Once created, link your local repository to GitHub using the command: git remote add origin https://github.com/YourUsername/YourRepository.git, replacing “YourUsername” and “YourRepository” with your GitHub details.
- Push your committed changes to GitHub by executing the command: git push origin master in the terminal.
![]()
Step 2: Establish a Confidential Variable in GitHub.
- Enhance security by setting up a secret variable in your GitHub repository. Enhance security by setting up a secret variable in your GitHub repository.
- This ensures sensitive information, such as Salesforce credentials, is stored securely and is only accessible by authorized workflows.
Go to Repository Settings:
- Navigate to your GitHub repository. Click on the “Settings” tab. In the left sidebar, select “Secrets. “Click on “New repository secret.”Navigate to your GitHub repository. Click on the “Settings” tab. In the left sidebar, select “Secrets. “Click on “New repository secret.”
- Add Repository Secret: Enter a name for your secret, for example, `ACC_SFDX_URL`.
- Set the value to force://<clientId>:<clientSecret>:<refreshToken>@<instanceUrl>
- Replace the value `<clientId>`, `<clientSecret>`, `<refreshToken>`, and `<instanceUrl>` with the corresponding values.
Create a Connect App in the target Org.:
- Go to “Apps” in the Quick Find Box and select “App Manager.”Go to “Apps” in the Quick Find Box and select “App Manager.”
- Create a new Connected App.
- Provide a name for the app in the “Connected App Name” field and the contact email.
- Enable OAuth settings by checking the corresponding checkbox.
- Set the Callback URL to https://login.salesforce.com/.
- In “Selected OAuth Scopes”. Save your settings and click “Continue.”
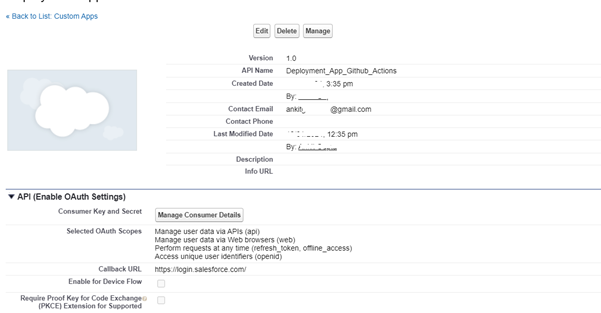
- Retrieve Consumer Key and Secret: Navigate to “Manage Consumer Details” within the Connected App. Copy both the Consumer Key and Consumer Secret.
- Access OAuth Policies: In the “Connected App” section, go to “Manager” and select “OAuth Policies.”

Generate Refresh Token and Instance URL:
- Create a Salesforce app and perform a search. Access the authorization URL:Create a Salesforce app and perform a search. Access the authorization URL:
- https://<YOUR_INSTANCE>.salesforce.com/services/oauth2/authorize?response_type=code&client_id=<CONSUMER_KEY>&redirect_uri=https://login.salesforce.com/
- Allow access if prompted and copy the authorization code from the redirected URL.
Use Postman to Get Refresh Token:
- Use Postman to send a POST request to:Use Postman to send a POST request to:
- https://<YOUR_INSTANCE>.salesforce.com/services/oauth2/token?code=<CODE>&grant_type=authorization_code&client_id=<CONSUMER_KEY>&client_secret=<CONSUMER_SECRET>&redirect_uri=https://login.salesforce.com/
- Replace `<YOUR_INSTANCE>`, `<CODE>`, `<CONSUMER_KEY>`, `<CONSUMER_SECRET>` with the obtained values.
- A refresh token serves as a secret key, allowing you to obtain a new access pass seamlessly, eliminating the need to re-enter your password every time.
Retrieve Values:
- Once you have the refresh token, instance URL, clientId, and clientSecret, you can compose the complete value
- force://<clientId>:<clientSecret>:<refreshToken>@<instanceUrl>
Now, you can use this composed value as a secret in your GitHub Actions workflow, ensuring secure access to your Salesforce instance.

Step 3: Upload the GitHub Action File to GitHub.
Create a GitHub Actions workflow file in your project repository. This file will define the deployment workflow, specifying the actions to be taken during deployment. Commit and push this file to your GitHub repository.
- Begin by creating a folder named “. github” in your project directory.
- Inside the “.github” folder, create another folder named “workflows“.
- Within the “workflows” folder, create a YAML file named “salesforce.yml“.
- Below is the content you should include in the “salesforce.yml” file.

- Make sure to create variable ${{ secrets.ACC_SFDX_URL}} using step 2.
Step 4: Commit and Push Code to GitHub.
- Commit and push your Salesforce code changes to the GitHub repository. Commit and push your Salesforce code changes to the GitHub repository.
- GitHub Actions will automatically trigger the deployment workflow defined in the workflow file.
- Modify Code: Make changes to your Apex class or related files.
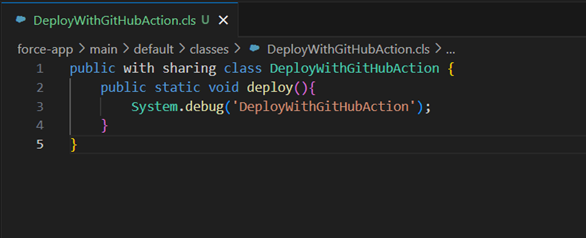
- Commit Changes: Record and save your modifications with a commit.
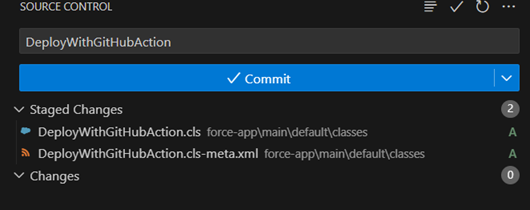
- Push to GitHub: Upload your changes to your GitHub repository.
- GitHub Action Triggers: Once pushed, a GitHub Action named DeployWithGitHubAction automatically starts.
- Automatic Deployment: DeployWithGitHubAction is configured to deploy changes to a target organization without manual intervention, streamlining the deployment process.
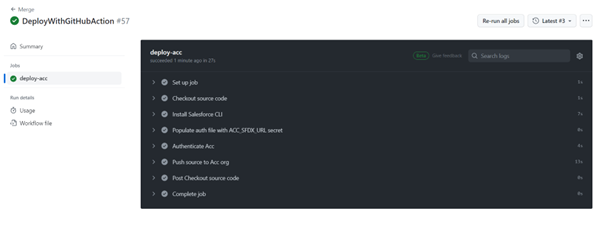
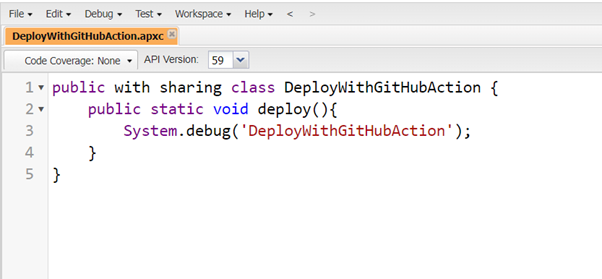
Step 5: Verify Your Code in the Target Organization
- Monitor the GitHub Actions workflow to ensure a successful deployment. Monitor the GitHub Actions workflow to ensure a successful deployment.
- Once completed, verify the changes in your Target Org to confirm the code has been successfully deployed.